FDPS Introduction
Overview
FDPS is a distributed deployment management system that enables batch provisioning of devices. After power-on and reboot, devices automatically send an AutoProvision configuration request to the FDPS server. The server responds with a customized configuration file containing user-defined parameters.
Account Levels
The FDPS system adopts a three-level hierarchical account management mechanism: Administrator, Agent, and Customer accounts. (This document focuses on system usage for Agent and Customer accounts.)
| Account Type | Functions |
| Administrator |
Ø Personal account management
Ø View system statistics (accounts, groups, devices)
Ø Agent account management
Ø View all system devices
Ø Account log management |
| Agent |
Ø Personal account management
Ø Sub-account management
Ø Sub-account MAC management
Ø Device management
Ø Group management
Ø Account log management |
| Customer |
Ø Personal account management
Ø Device management
Ø Group management
Ø Account log management |
System Usage
System Login
On the login page, enter your username and password, then click the login button to access the FDPS management platform (Figure 1-1). (All accounts support single login only; a subsequent login will force the previous session to log out.)
The login page also provides a user manual download via the User Manual button, offering both English and Chinese versions.
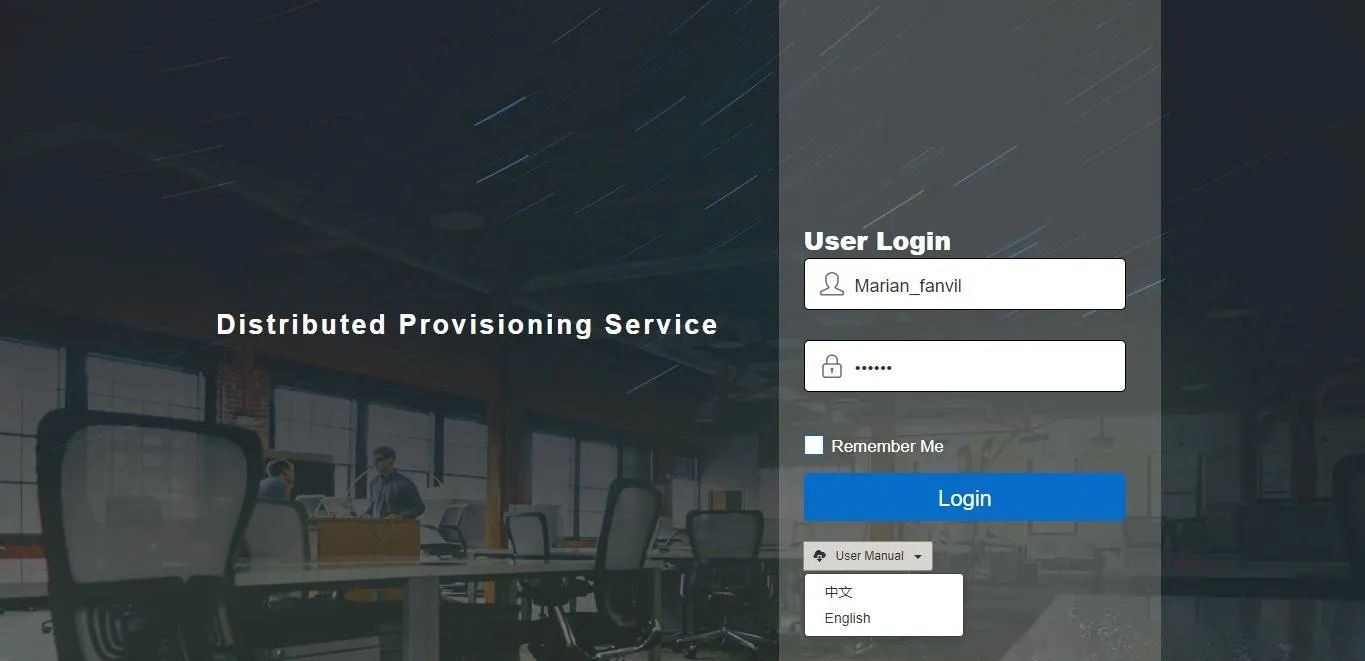
Figure 1-1
Agent Account
Each Agent (secondary administrator) account must be created by the system Administrator, who assigns the account username and initial password. Agents can log in using the initial credentials provided.
Account Info Management
After logging in, the Agent lands on the home page (Figure 2-1). The INFO page displays account statistics (total accounts, devices, groups), personal information, and a password modification interface.
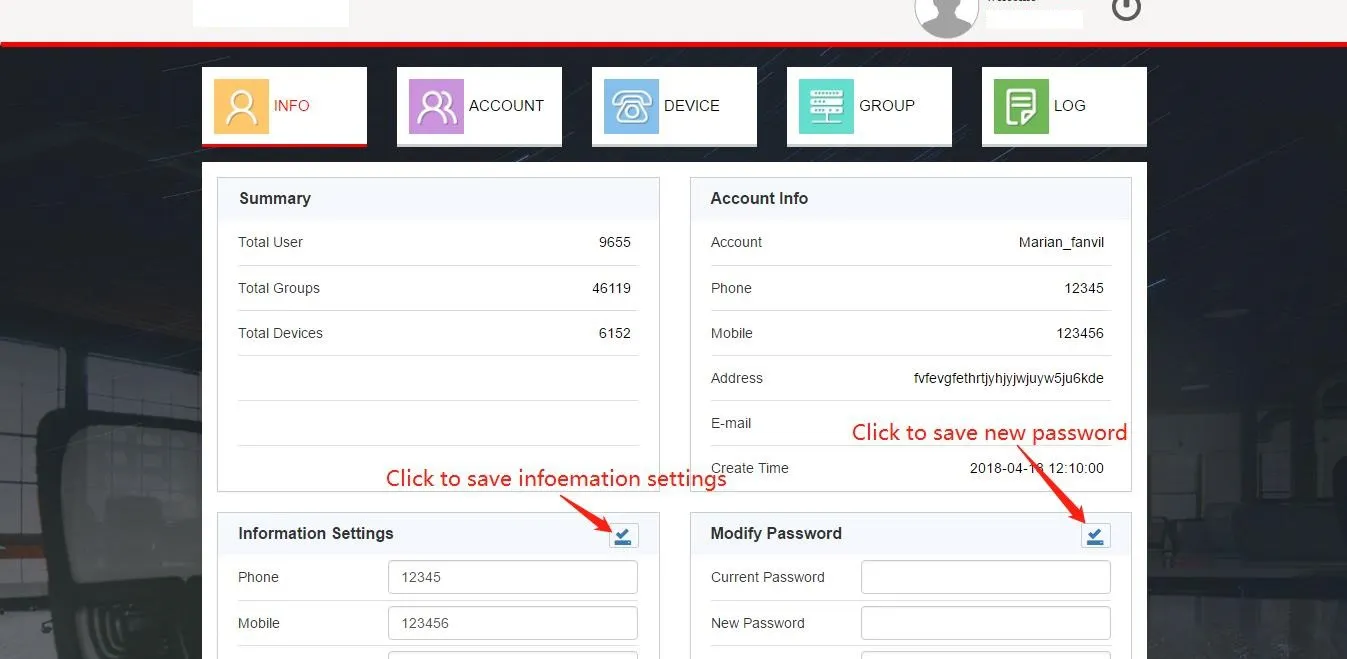
Figure 2-1
Users can modify personal information directly on this page, including password, contact details, address, and email. Updated information will be shown in the Account Info card after saving.
Account Management
Click the ACCOUNT tab to access the customer account management module (Figure 2-2). This interface supports adding, deleting, searching, and resetting passwords for customer accounts.
1. Add Customer Account
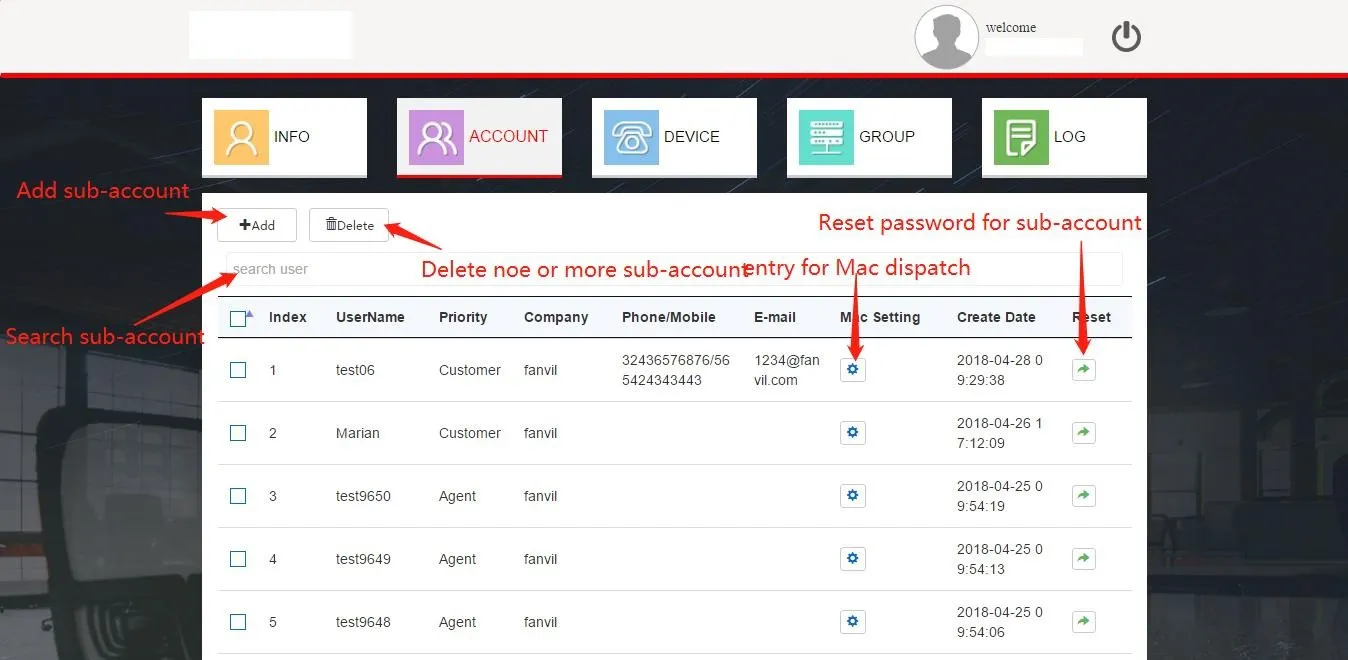
Figure 2-2
Click the Add button to open the Add User dialog (Figure 2-3). Fill in the required information and click Done to create the customer account.
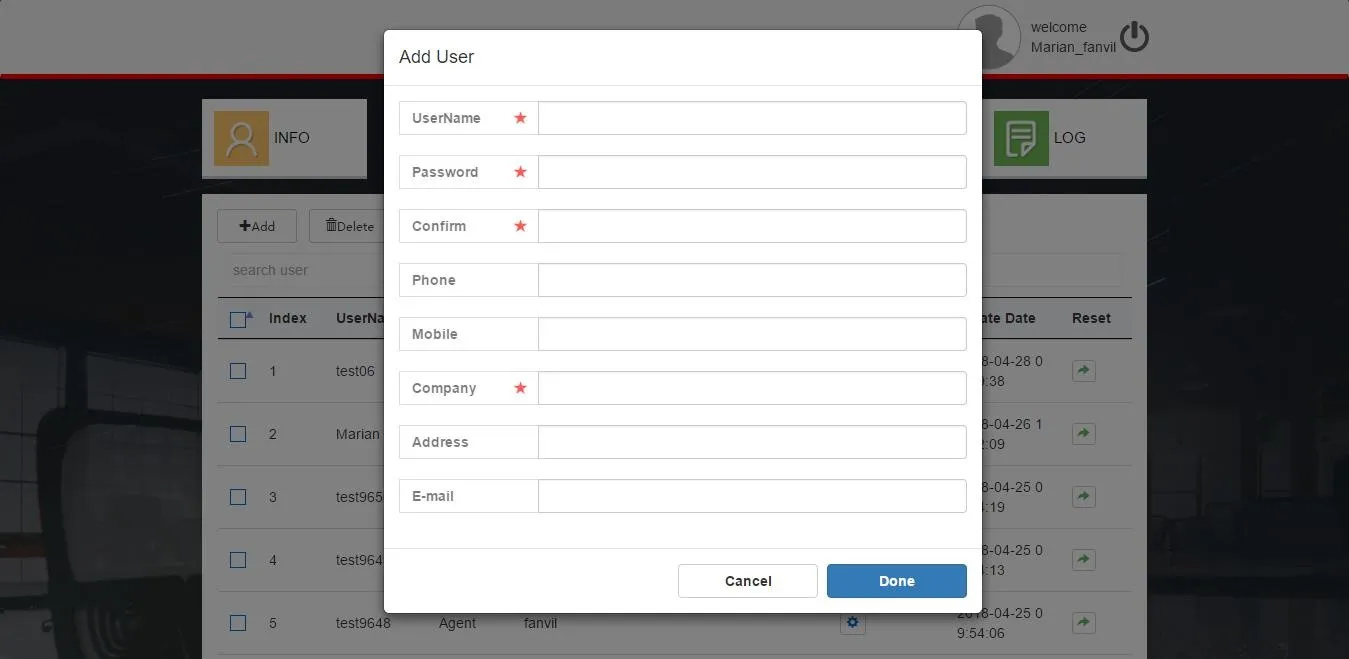
Figure 2-3
2. Delete Customer Account
Select the target account and click the Delete button (Figure 2-2). Confirm the deletion in the pop-up prompt by clicking OKAY.
3. Reset Customer Account Password
Click the Reset button for the target account (Figure 2-2). Enter the new password in the pop-up dialog to complete the reset.

Figure 2-4
4. Search Accounts
Enter keywords in the search user field (Figure 2-2) to quickly find accounts.
5. Sub-account MAC Address Management
Agents must assign MAC addresses to customers; unassigned MACs are invalid and cannot be registered by customers. Click the button shown in Figure 2-5 to access the MAC assignment page (Figure 2-6).
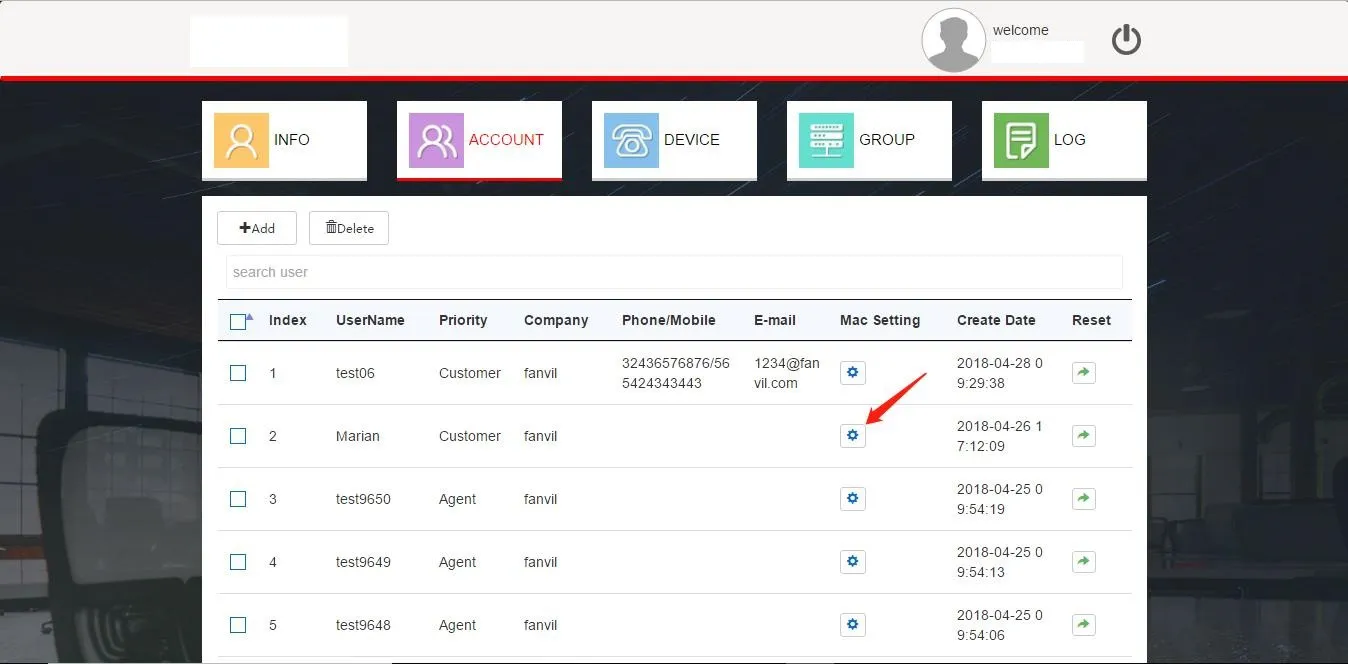
Figure 2-5
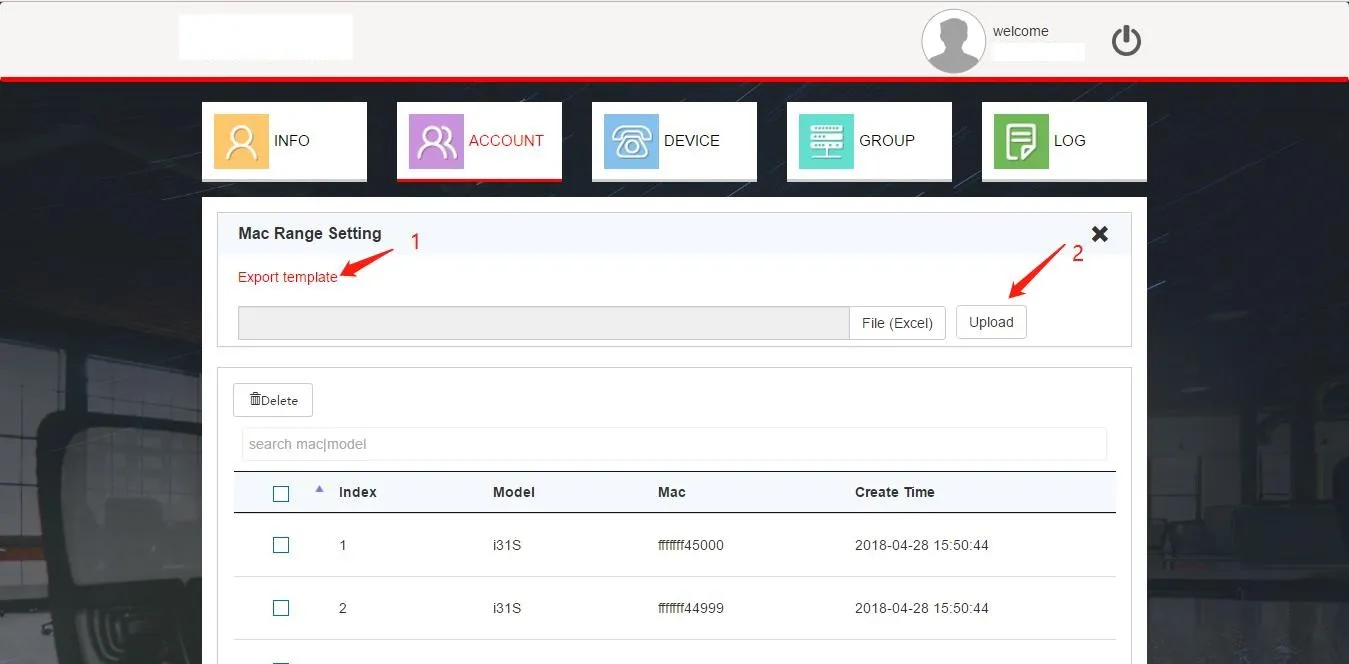
Figure 2-6
1) MAC Address Assignment
The system supports MAC assignment via Excel import only. Click the link labeled 1 to download the template file. Populate the template with MAC addresses, then click File (Excel) (label 2) to upload the file. Assigned MACs will appear in the list, allowing customers to manage corresponding devices.
Note: Maximum 30,000 entries per import (within 5 minutes). For efficiency, import 10,000 entries per batch (approx. 5 seconds).
2) MAC Address Reclamation
Agents can delete MACs from the sub-account MAC list to reclaim them. Reclaimed MACs are removed from the customer's device list and can no longer be managed by the sub-account.
Device Management
Agents can register and manage devices. Click the DEVICE tab to view the device list (Figure 2-7).
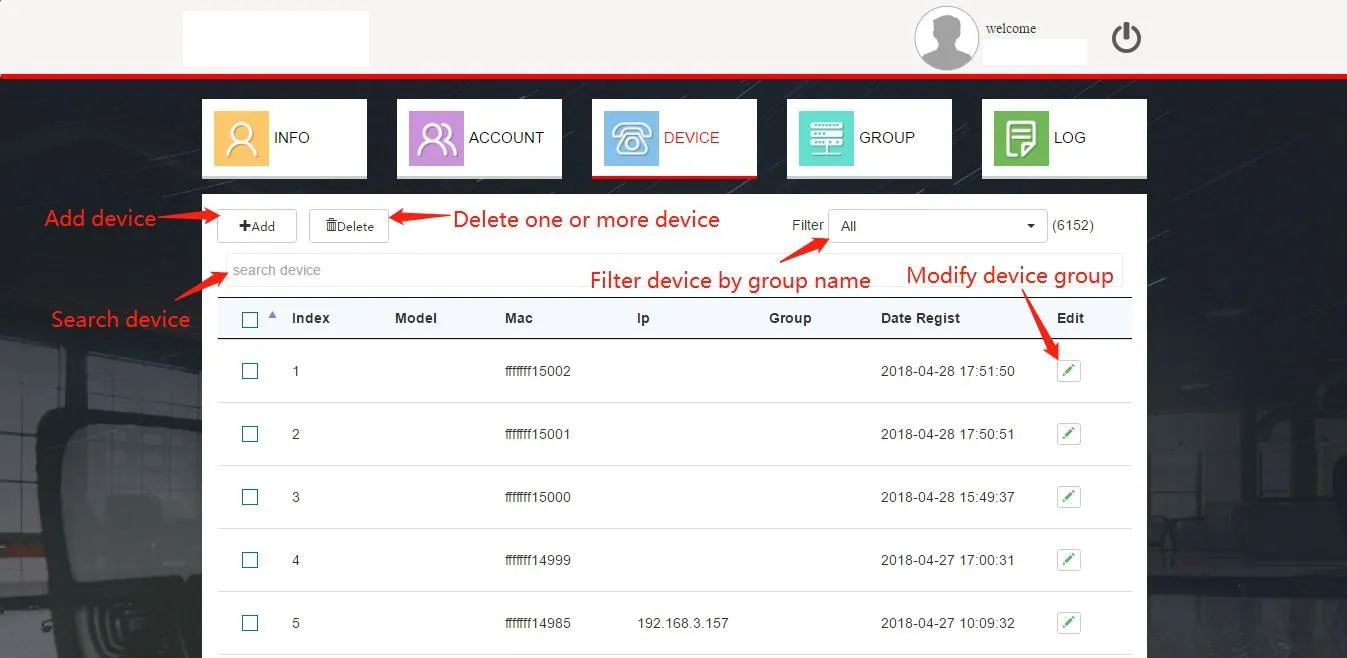
Figure 2-7
1. Add Devices
Devices are added via Excel batch import. Click the Add button (Figure 2-7) to access the import page (Figure 2-8). Select a default group to associate imported devices, then upload the file. The list refreshes upon successful import.
Notes:
1. Use the same template as MAC address import.
2. Max 30,000 entries per import; recommended batch size: 10,000 entries.
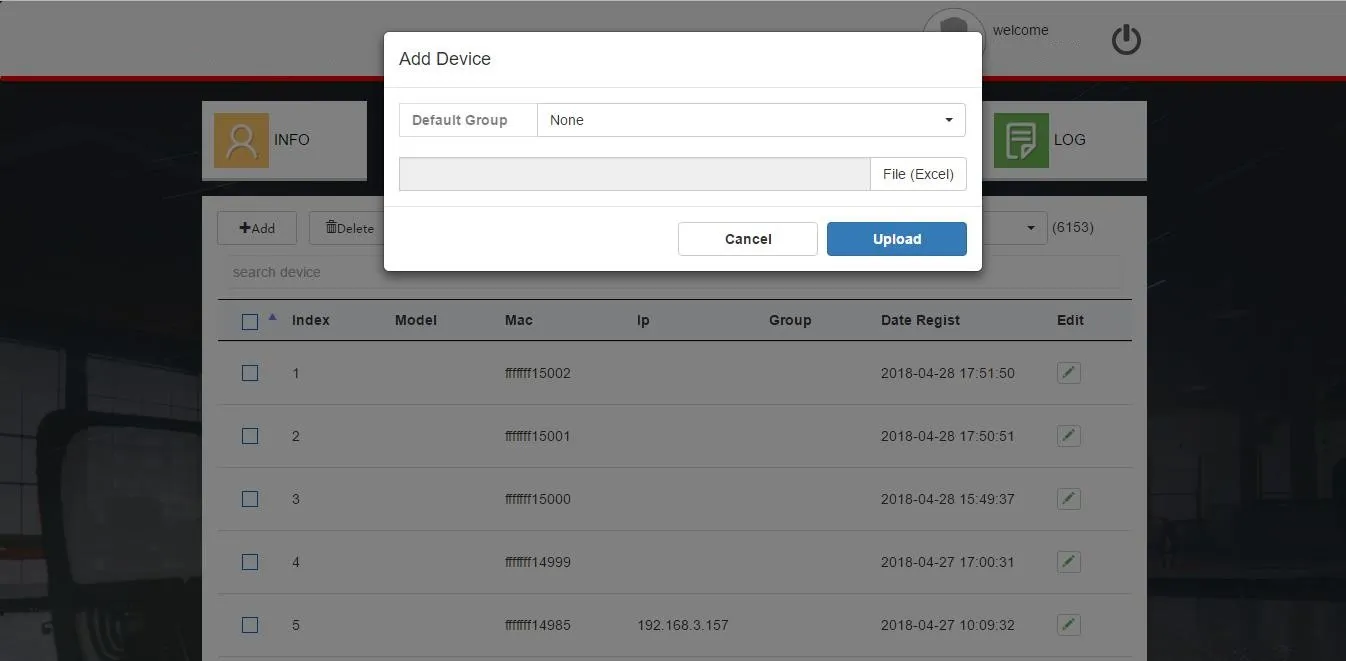
Figure 2-8
2. Delete Devices
Select devices and click the Delete button (Figure 2-7) to remove them.
3. Search Devices
Enter a MAC address in the search box (Figure 2-7) to find devices. Use the Filter dropdown to display devices by group.
4. Edit Device Group
Click the Edit button in the list (Figure 2-7) to open the group selection dialog (Figure 2-9). Select a new group and click Done. Devices will fetch the new group configuration from FDPS after updating.

Figure 2-9
5. Batch Add Devices to Group
Use the shortcut at the bottom of the DEVICE page (Figure 2-10) to batch assign up to 50 devices (current page) to a group. Select devices, choose a group, and click Link, add to group.

Figure 2-10
Group Management
A Group is an auto-provisioning configuration template matching the device's web UI settings, used for bulk configuration. After associating a group, devices request and apply the group configuration from FDPS (Figure 2-11).

Figure 2-11
1. Add Group
Click Add (Figure 2-11) to open the creation page (Figure 2-12). Enter a group name, configure parameters, and click Done to create.
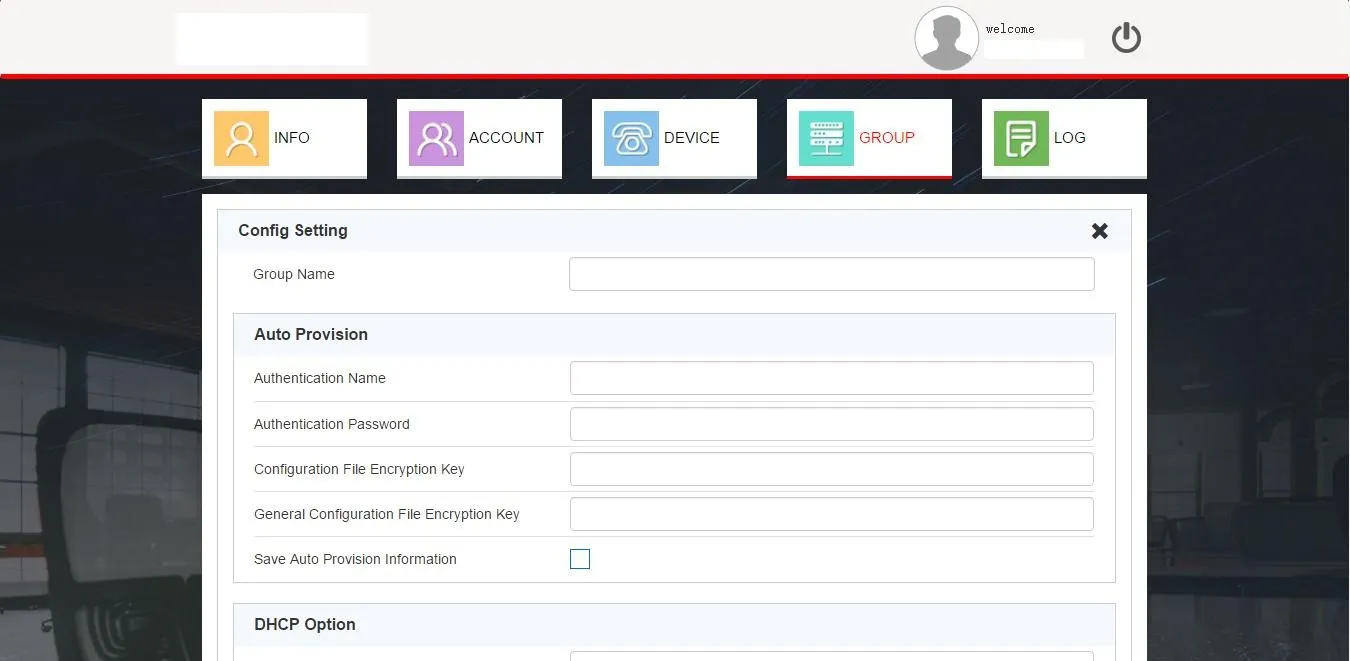
Figure 2-12
2. Edit Group
Click the Edit button (Figure 2-11) to modify settings (Figure 2-13). Save changes with Done.
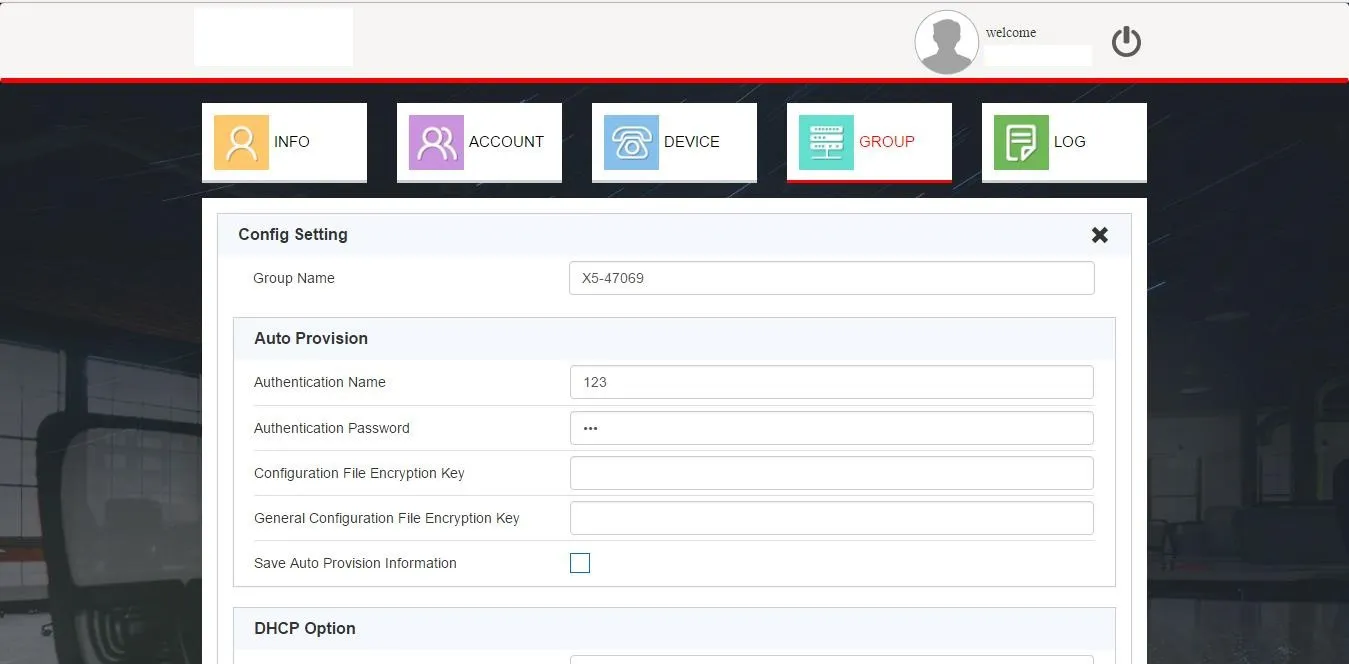
Figure 2-13
3. Delete Group
Select groups and click Delete to remove them.
4. Search Group
Enter keywords in the search group field (Figure 2-11) to filter groups by name or creation time.
5. View Group Devices
Click the Devices button for a group (Figure 2-11) to jump to the filtered device list.
Log Management
The system logs all account operations (Figure 2-14). Supports downloading the latest 10,000 logs, searching, deleting, and clearing logs.
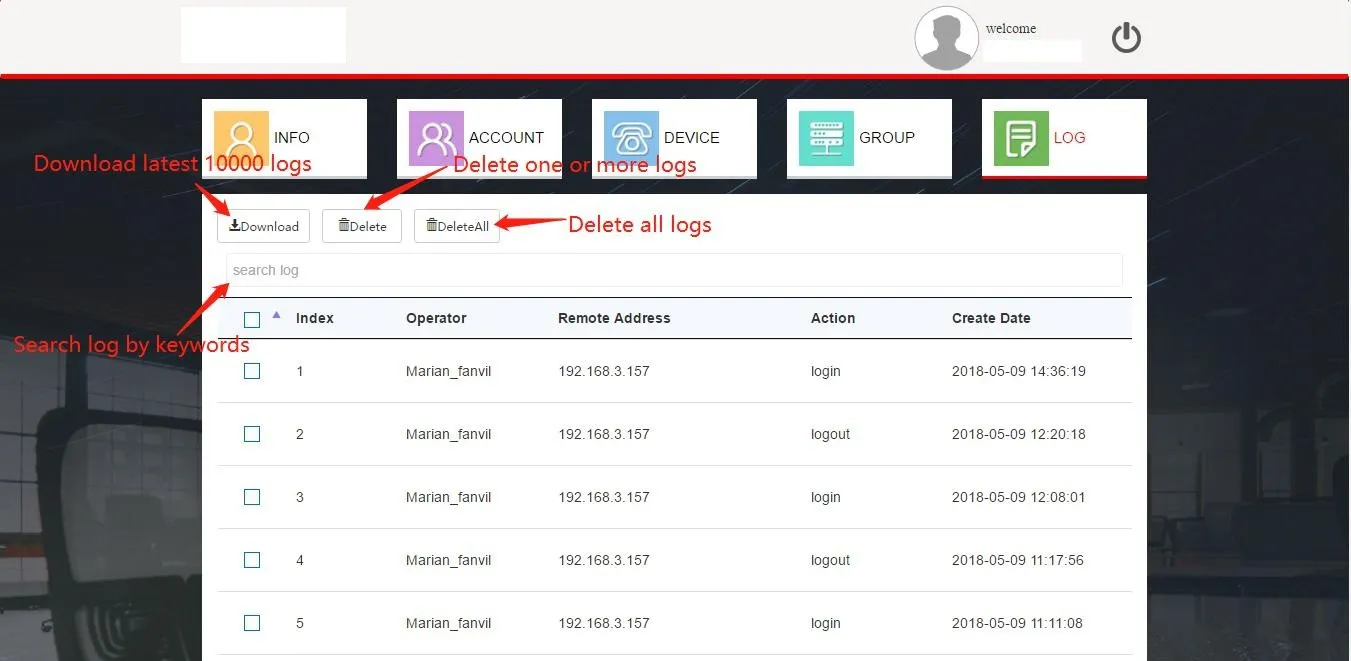
Figure 2-14
Customer Account
Customer accounts are sub-accounts created by Agents. Deleting an Agent account removes all its associated Customer accounts. Customers cannot create sub-accounts and only manage MACs assigned by their parent Agent.
Account Info Management
The Customer home page (Figure 2-15) displays statistics, personal info, and password settings, identical to the Agent INFO page.
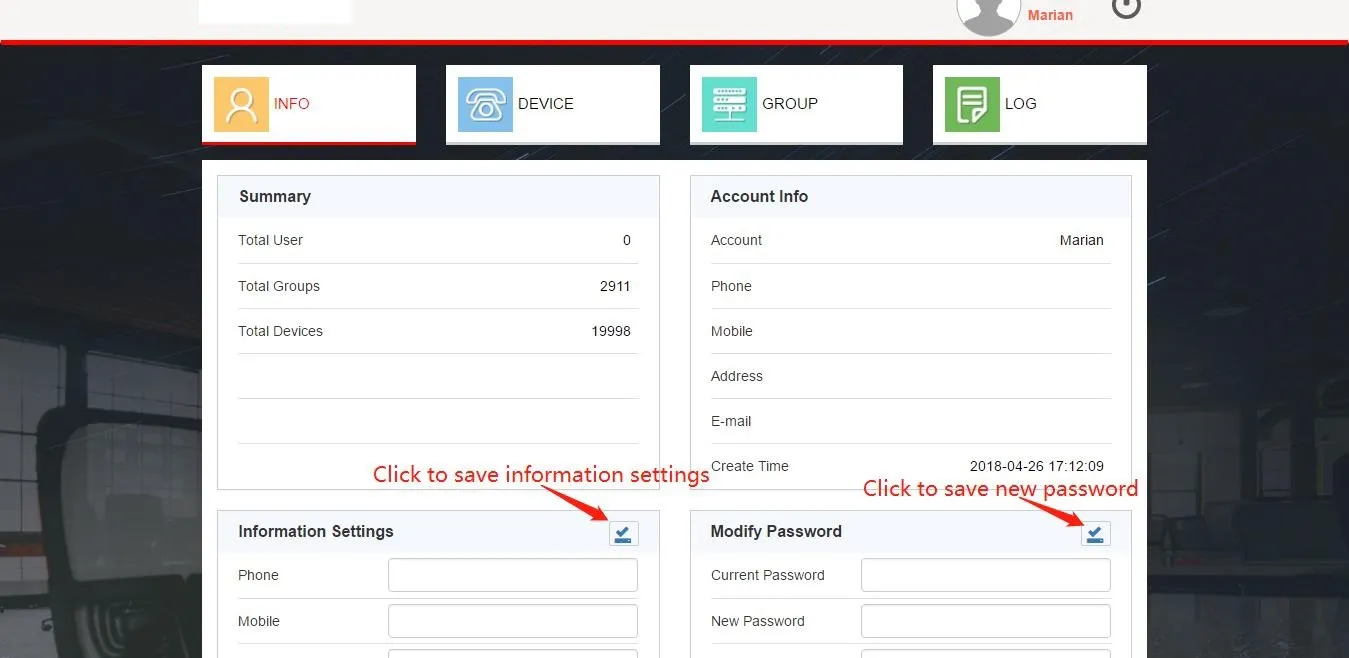
Figure 2-15
Users can update password, contact, address, and email details here.
Device Management
Click DEVICE to manage valid (Agent-assigned) MAC devices (Figure 2-16). Only registered devices can fetch configurations from FDPS.
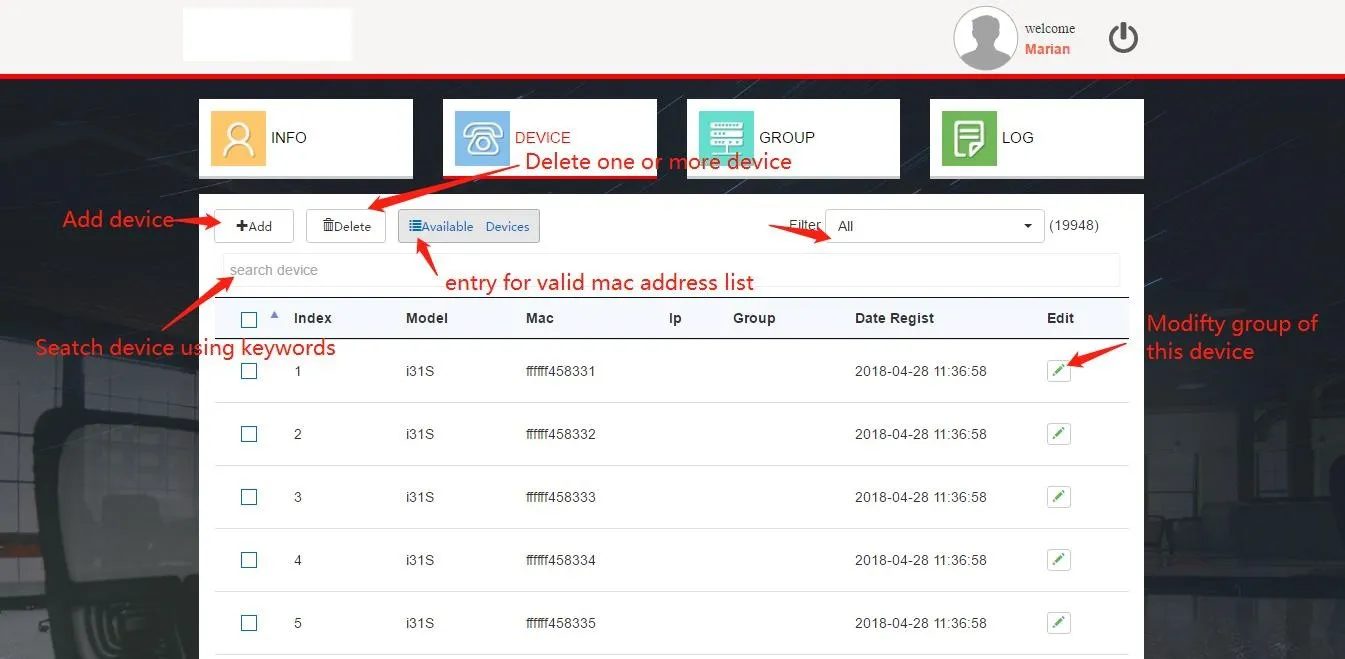
Figure 2-16
1. View Valid Devices
Click Available Devices (Figure 2-16) to view assigned MACs (Figure 2-17). Select MACs and click Register to add them to the managed device list.
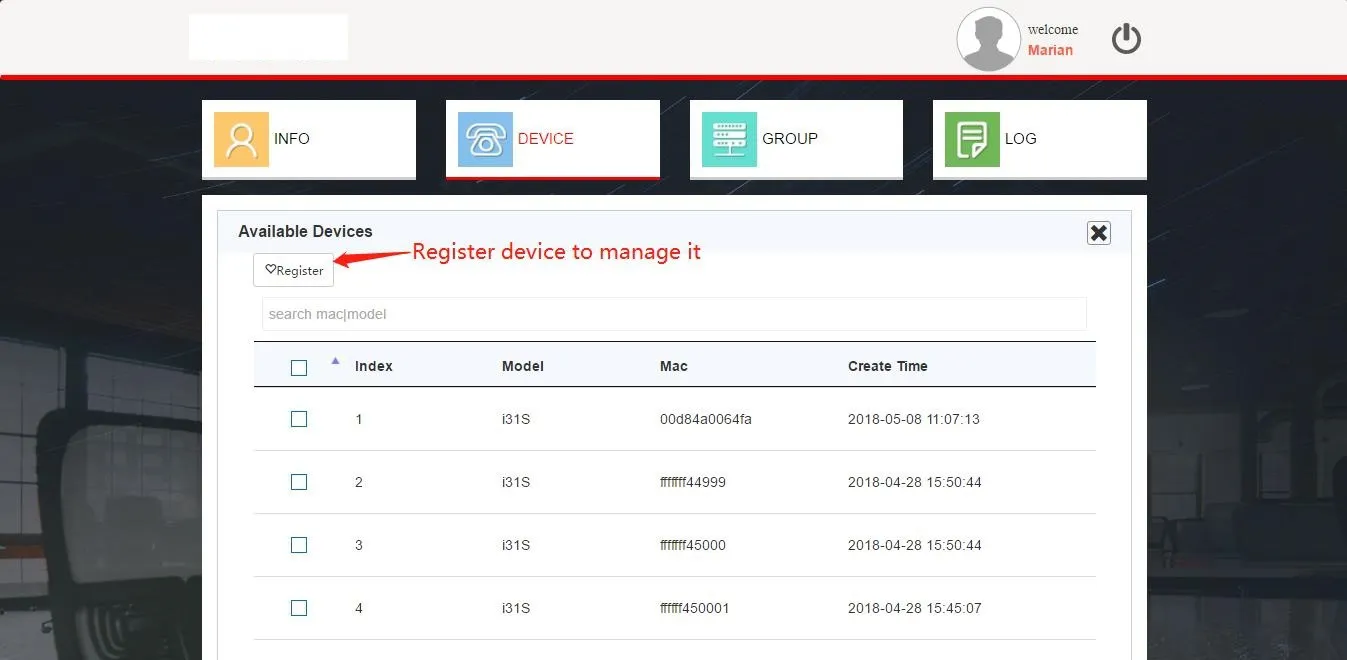
Figure 2-17
2. Add Devices
Batch import via Excel (Figure 2-18). Select a default group for association. Use the standard template (max 30,000 entries per import).
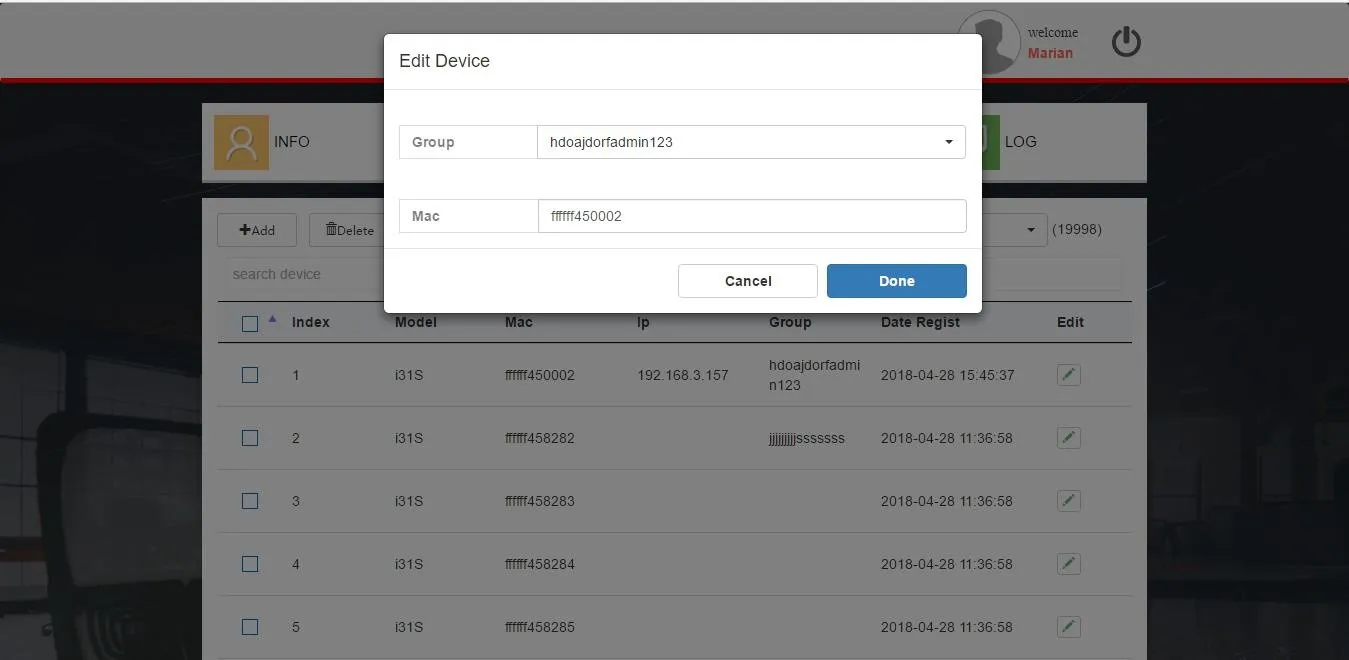
Figure 2-18
3. Batch Add Devices to Group
Use the bottom shortcut (Figure 2-19) to assign up to 50 devices to a group.
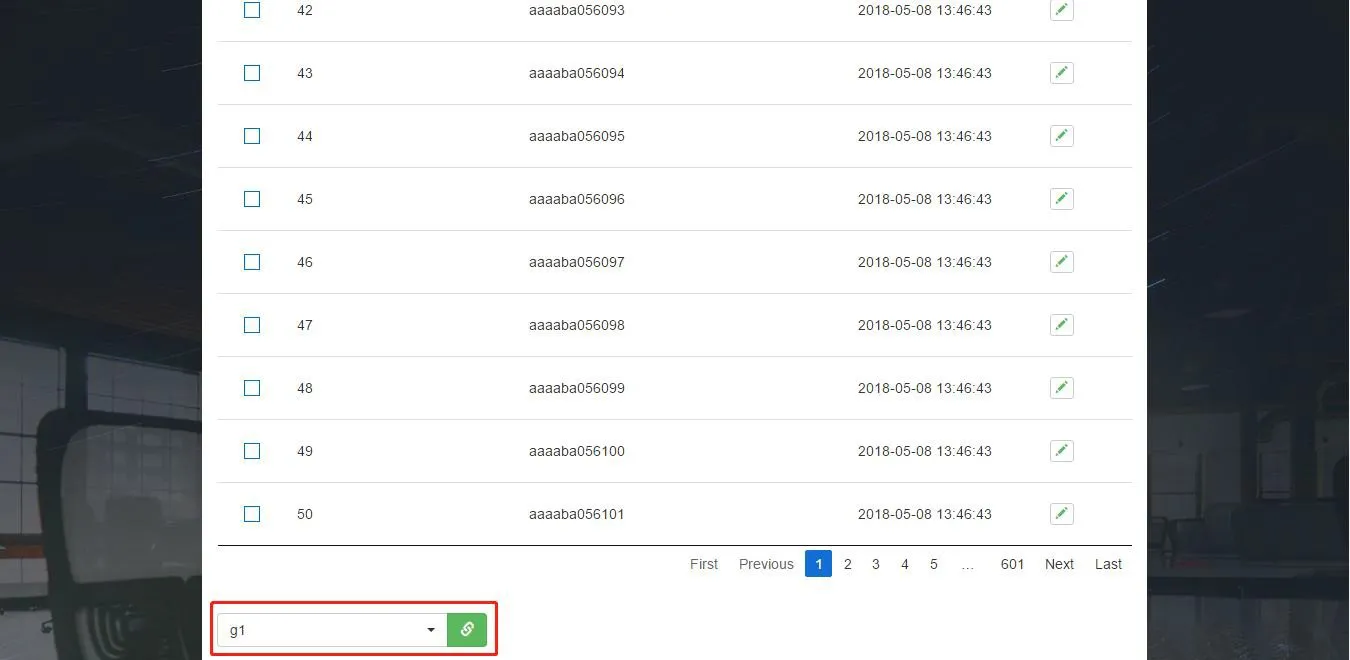
Figure 2-19
Group Management
Groups function as auto-provision templates for bulk device configuration (Figure 2-21). Devices apply the associated group configuration from FDPS.

Figure 2-21
1. Add Group
Click Add (Figure 2-21), configure parameters (Figure 2-22), and save with Done.
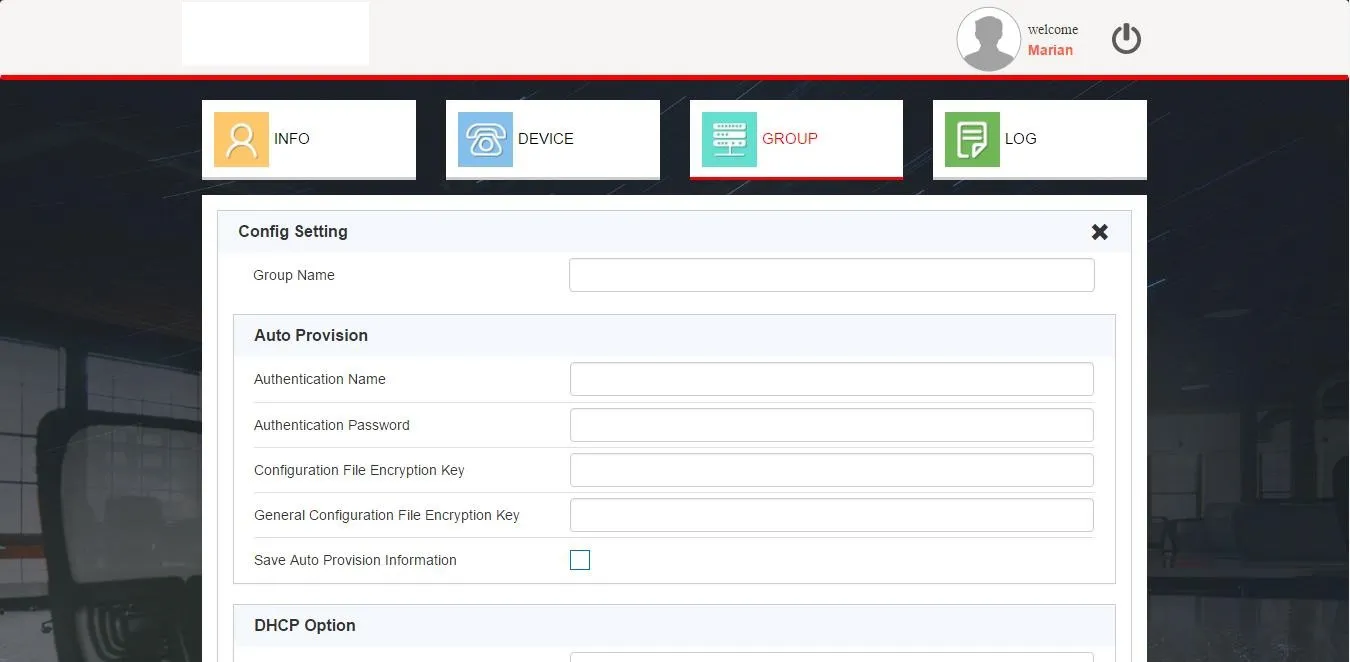
Figure 2-22
2. Edit Group
Click Edit (Figure 2-21), update settings (Figure 2-23), and save.
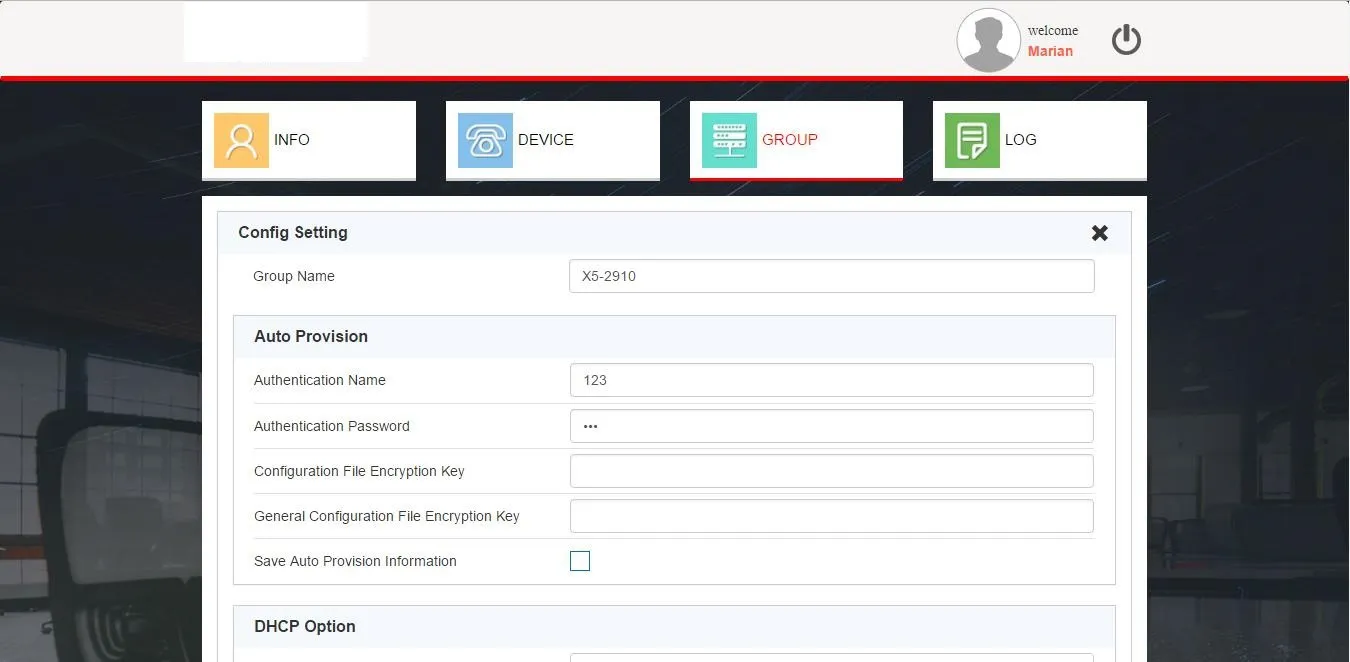
Figure 2-23
3. Delete / Search Group / View Group Devices
Functions are identical to the Agent group management features.
Log Management
Customer accounts have full log functionality: view operations, download the latest 10,000 logs, search, delete, and clear records.

Packet Capture: Device & FDPS (RPS) Server Interaction
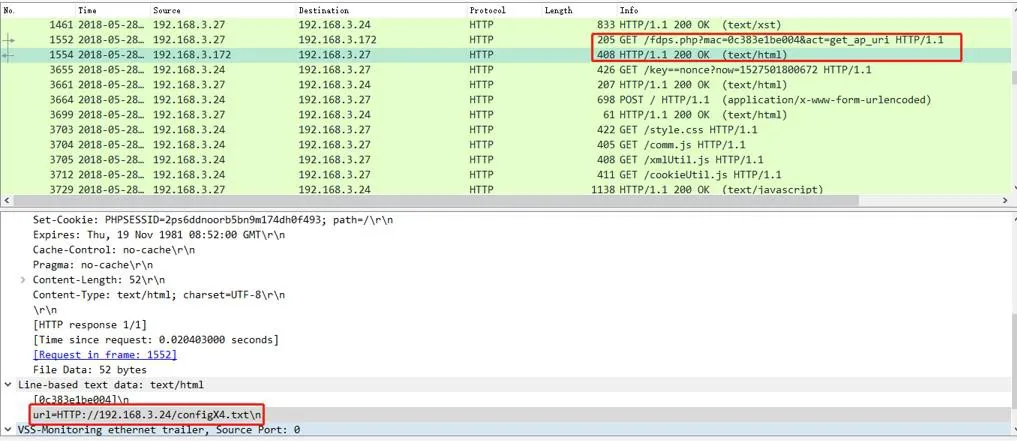
get_ap_url Method
After reboot, the device sends an HTTP request to FDPS to fetch the URL path. For registered devices, the server responds with the phone flash URL of the assigned group. The device uses this URL for auto-provisioning.
get_ap_config Method
After reboot, the device sends an HTTP request to fetch the configuration file. The server responds with the group configuration data. The device applies this to Auto Provision to complete deployment.